How LibOQS Uses Valgrind to Hunt for Constant-Time Leaks?
Author: Shubham Kumar
Published: November 6, 2025
In cryptography, ensuring constant-time execution is a critical defense against timing side-channel attacks. An implementation is considered constant-time if its execution time and memory access patterns are independent of secret-valued inputs. Failure to adhere to this principle can allow an attacker to infer secret data, such as a private key, simply by measuring the time an operation takes.
The liboqs project has a specific goal: to ensure that every single instance of secret-dependant control flow is documented. While this process doesn’t guarantee all code is perfectly constant-time, it provides a powerful tool to aid auditors in their search for non-constant-time behavior.
This documentation explores how liboqs implements this check. The testing methodology itself is built on established techniques. The core observation that Valgrind can be used to identify non-constant-time behaviour is from Adam Langley [1], & [2]. This idea was applied to the SUPERCOP benchmarking suite by Mortiz Neikes’ TIMECOP project [3], which (starting in 20200816) specifically applied it to randombytes calls [4]. The liboqs test suite borrows this concept of instrumenting randombytes calls.
Core Detection Methodology
The testing strategy, inspired by work from Adam Langley, uses a clever “trick” with Valgrind’s Memcheck tool. Normally, Memcheck is used to find memory errors, like reading uninitialized data. The liboqs test suite leverages this by telling Valgrind that all secret data is uninitialized data.
Here’s how it works:
The test programs (
test_kemandtest_sig) are run through Valgrind.The tests intercept all calls to
OQS_randombytes, which is the function used to generate secret keys and other random values.Instead of just getting random bytes, the interceptor “poisons” them. It gets the real random bytes (so the crypto works) but then tells Valgrind that this block of memory is “uninitialized.”
As the cryptographic algorithm runs, if it ever makes a decision based on that secret data (like an
if (secret[0] > 10)), Valgrind sees a “conditional jump… depends on uninitialised value” and reports an error.
This immediately flags any code path that branches on secret data.
Secret Key Generation
        ↓
    [Real Random Bytes: 0x4F, 0x2A, 0x91, ...]
        ↓
    MARK AS "UNINITIALIZED" (Poison)
        ↓
    [Same Bytes, but Valgrind Tracking]
        ↓
    Use in Cryptography
        ↓
    if (secret[0] > 128) ← VALGRIND: "WARNING!"
The Suppression File System
Not all Valgrind errors are critical security flaws. The purpose of this system is to document all suspected non-constant-time behavior. The liboqs codebase includes a set of “suppression files.” Each file documents one or more of these Valgrind errors. When the test script runs, it passes these files to Valgrind to “silence” known errors.
If the script runs without error, it means all suspected non-constant-time behavior is documented.
If the script fails, it means a new, undocumented instance has been found.
These suppressions are organized into two categories:
passes/: For errors that are known not to be a security threat (e.g., branching on public data).
issues/: For errors that are being tracked as potential issues.
Part 1: How to Run the Constant-Time Tests
You can run these tests yourself by building liboqs with the correct flags.
Prerequisites
OS: Ubuntu 22.04
Memory: At least 4-8 GB
Disk Space: More than 5 GB
Install required tools and libraries:
sudo apt update
sudo apt install astyle cmake gcc ninja-build libssl-dev \
                python3-pytest python3-pytest-xdist unzip xsltproc \
                doxygen graphviz python3-yaml valgrind
Quick Installation
# Get the source code
git clone https://github.com/open-quantum-safe/liboqs.git
cd liboqs

# Create build directory
mkdir build && cd build

# Configure build with constant-time testing enabled
cmake -GNinja .. \
    -DCMAKE_BUILD_TYPE=Debug \
    -DOQS_ENABLE_TEST_CONSTANT_TIME=ON \
    -DOQS_DIST_BUILD=ON

# Optional extra flags you can add:
# -DCMAKE_INSTALL_PREFIX=/usr/local      # Install location
# -DOQS_USE_OPENSSL=ON                   # Use OpenSSL primitives
# -DOQS_ENABLE_KEM_CLASSIC_MCELIECE=OFF  # Skip slow algorithms
# -DBUILD_SHARED_LIBS=ON                 # Build shared libs

# Build the library
ninja
Running Constant-Time Tests
Test All Algorithms
# From the build/ directory
python3 ../tests/test_constant_time.py
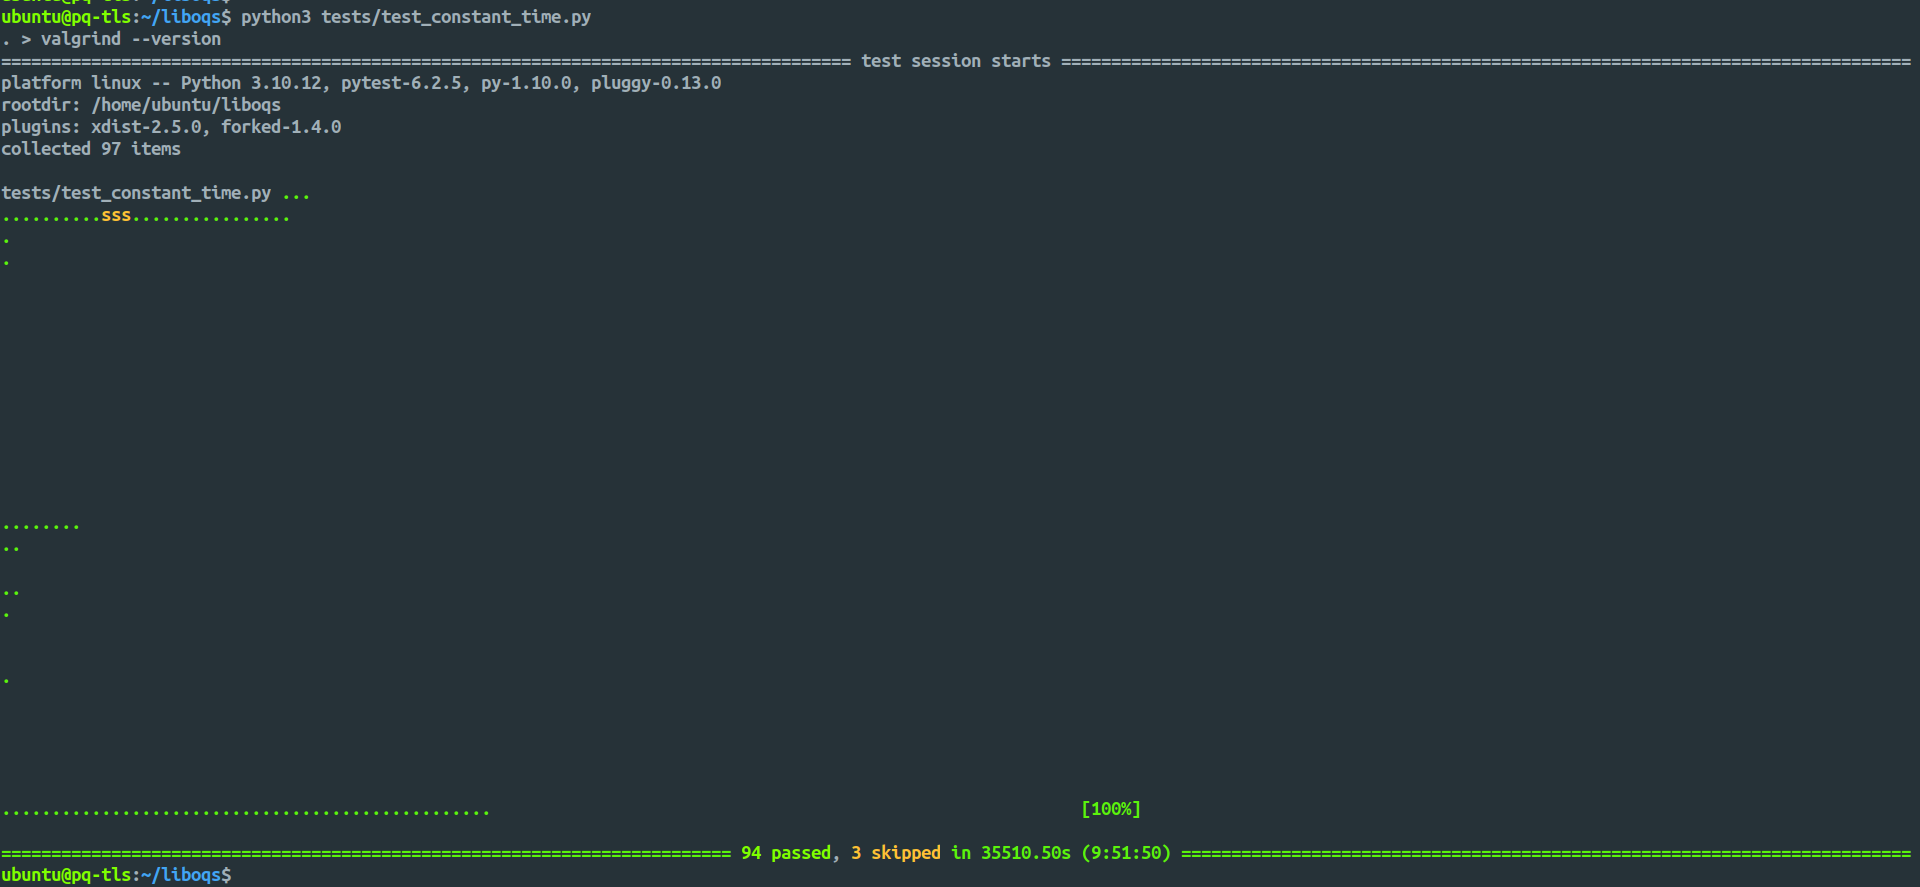
Note: Ignore the extra line breaks — I pressed Enter multiple times to ensure the program hadn’t frozen.
Test Specific Algorithms
# Test only Kyber
python3 ../tests/test_constant_time.py -k Kyber

# Test specific variant
python3 ../tests/test_constant_time.py -k ML-KEM-512

# Test with verbose output
python3 ../tests/test_constant_time.py -v -k Dilithium
Skip Slow Algorithms
# Set environment variable to skip certain algorithms
export SKIP_ALGS="Classic-McEliece,HQC"
python3 ../tests/test_constant_time.py
Part 2: A Deeper Look at the Implementation
This testing framework is a combination of a Python script, the C test binaries, and the Valgrind tool.
Code References:
Implementation Architecture
The file structure for managing suppressions is key:
liboqs/
├── tests/
│   ├── test_constant_time.py      # Main orchestrator
│   ├── test_kem.c                 # KEM test binary
│   ├── test_sig.c                 # Signature test binary
│   └── constant_time/
│       ├── kem/
│       │   ├── passes.json        # Acceptable timing variations
│       │   ├── issues.json        # Problematic timing leaks
│       │   ├── passes/            # Suppression files (OK)
│       │   │   └── *
│       │   └── issues/            # Suppression files (problems)
│       │       └── *
│       └── sig/
│           └── (same structure)
Key Functions and Their Roles
The magic happens in the C code, specifically in test_kem.c (and test_sig.c).
1. main() in test_kem.c - The Setup
This is where the interceptor is installed. When OQS_ENABLE_TEST_CONSTANT_TIME is set, it overrides the default random-bytes generator.
// main function initialization
int main(int argc, char **argv) {
    // ... initialization code ...

    #ifdef OQS_ENABLE_TEST_CONSTANT_TIME
    // THIS IS THE KEY: Install our interceptor function
    OQS_randombytes_custom_algorithm(&TEST_KEM_randombytes);
    #endif

    // ... rest of main function ...
    // Now all calls to OQS_randombytes will go through TEST_KEM_randombytes
}
2. TEST_KEM_randombytes - The Interceptor
This function intercepts all requests for random bytes. It performs a “switching dance” to get real bytes and then “poisons” them.
#ifdef OQS_ENABLE_TEST_CONSTANT_TIME
static void TEST_KEM_randombytes(uint8_t *random_array, size_t bytes_to_read) {
    // Step 1: Temporarily switch to the real system RNG
    // (to avoid infinite recursion)
    OQS_randombytes_switch_algorithm("system");

    // Step 2: Get REAL random bytes (so crypto works correctly)
    OQS_randombytes(random_array, bytes_to_read);

    // Step 3: Switch back to ourselves for future calls
    OQS_randombytes_custom_algorithm(&TEST_KEM_randombytes);

    // Step 4: THE MAGIC - Tell Valgrind these bytes are "uninitialized"
    // Even though they contain real random data!
    OQS_TEST_CT_CLASSIFY(random_array, bytes_to_read);
}
#endif
3. OQS_randombytes and its Helpers
These functions manage a global function pointer (oqs_randombytes_algorithm) to determine which RNG to use.
// This is what all cryptographic code calls to get random bytes.
void OQS_randombytes(uint8_t *random_array, size_t bytes_to_read) {
    // Calls whatever function oqs_randombytes_algorithm points to
    oqs_randombytes_algorithm(random_array, bytes_to_read);
}

// This function changes which random number generator is active.
OQS_STATUS OQS_randombytes_switch_algorithm(const char *algorithm) {
    if (strcasecmp("system", algorithm) == 0) {
        // Switch to system RNG
        oqs_randombytes_algorithm = &OQS_randombytes_system;
        return OQS_SUCCESS;
    }
    // ... other options like "openssl" ...
    return OQS_ERROR;
}

// This sets a custom random number generator (like our interceptor).
void OQS_randombytes_custom_algorithm(void (*algorithm_ptr)(uint8_t *, size_t)) {
    // Change the global function pointer
    oqs_randombytes_algorithm = algorithm_ptr;
}
4. OQS_TEST_CT_CLASSIFY - The Poison Macro
This is the macro that actually tells Valgrind to mark the memory as uninitialized.
#define OQS_TEST_CT_CLASSIFY(addr, len) \
    VALGRIND_MAKE_MEM_UNDEFINED(addr, len)
Complete Call Flow
This diagram shows the full process, from the Python script to the Valgrind warning.
Phase 1: Initialization
1. test_constant_time.py starts
        ↓
2. Loads suppression files from JSON
        ↓
3. Builds Valgrind command:
   valgrind --tool=memcheck \
            --suppressions=passes/file1 \
            --suppressions=issues/file2 \
            ./test_kem ML-KEM-512
        ↓
4. Launches test_kem under Valgrind
Phase 2: Setup
5. test_kem main() starts
        ↓
6. Installs interceptor:
   OQS_randombytes_custom_algorithm(&TEST_KEM_randombytes)
        ↓
   [Now: oqs_randombytes_algorithm = TEST_KEM_randombytes]
Phase 3: Runtime
7. Test function runs:
   kem_test_correctness()
        ↓
8. Crypto needs random bytes:
   OQS_KEM_keypair() calls OQS_randombytes(secret_key, 32)
        ↓
9. OQS_randombytes routes to TEST_KEM_randombytes:
   TEST_KEM_randombytes(secret_key, 32)
        ├── Switch to system RNG
        ├── Get real random bytes [0x4F, 0x2A, ...]
        ├── Switch back to interceptor
        └── POISON the bytes (mark as uninitialized)
        ↓
10. secret_key now contains real data BUT Valgrind thinks it's uninitialized
        ↓
11. Crypto uses the secret key:
    if (secret_key[0] == 0)  // Valgrind: "WARNING! Branch on uninitialized!"
Phase 4: Detection
12. Valgrind reports error and exits with code 1
        ↓
13. Python checks exit code:
    - Error + NOT in suppressions = TEST FAILS (new leak!)
    - Error + IN suppressions = TEST PASSES (known issue)
    - No error = TEST PASSES (no leaks detected)
Why The Switching Dance?
The temporary switch inside TEST_KEM_randombytes is critical. It prevents infinite recursion:
// WITHOUT switching (would crash!):
TEST_KEM_randombytes() {
    OQS_randombytes();  // Calls TEST_KEM_randombytes
                        // Which calls OQS_randombytes
                        // Which calls TEST_KEM_randombytes
                        // INFINITE LOOP!
}

// WITH switching (works!):
TEST_KEM_randombytes() {
    switch_to_system();   // Now points to system RNG
    OQS_randombytes();    // Calls system RNG (not ourselves!)
    switch_back_to_us();  // Ready for next interception
}